How to Make Simple Digital Stickers For GoodNotes in PicMonkey
Learn how to take a piece of clip art and make color-coordinated rectangle digital stickers to use in your GoodNotes digital planner. One simple rectangle shape can be resized to any width and height inside GoodNotes, making it the most versatile digital sticker and it’s so easy to make using PicMonkey, a free photo editing/graphics software. For a step-by-step tutorial, watch the video demonstration!
How to Make Simple Digital Stickers For GoodNotes in PicMonkey
Digital planning is so much fun! If you’re like me and use a digital planner inside of the GoodNotes app, you may want to sometimes add digital stickers, or images, to make your planner more colorful and more fun.
You can purchase digital stickers (which are just PNG images with a transparent background), but they are so easy to make them yourself, even if you are tech-challenged!
I’ll show you how you can make simple color-coordinated banners, boxes, and shapes to use in your digital planner FOR FREE.
Making you own digital stickers is so much fun too!
In this post I will share how to take one piece of clip art (or any image) to create a color palette and make simple coordinating digital stickers to use in Goodnotes.
I'll do this using Picmonkey, a free photo editing/graphics software. You can use more advanced , i.e. "expensive and complicated" photo software, but Picmonkey is super easy and it allows you to create PNG images with transparent backgrounds, i.e. "digital stickers."
In this post you’ll learn:
What are digital stickers?
A sneak peek at simple digital stickers you can make for free in PicMonkey
A how-to video tutorial, if you prefer to watch
How to find free images to use in your digital planner
How to create a color palette for your digital stickers using PicMonkey
How to make basic rectangles
How to make semi-transparent banners to use as overlays
How to save your digital stickers as a “sticker sheet” to crop in GoodNotes
How to save your digital stickers individually
How to import your digital stickers into your GoodNotes digital planner
How to crop digital stickers inside GoodNotes
How to resize digital stickers in GoodNotes
The supplies I am using in this digital planning tutorial:
My iPad Pro 10.5 inch). This is a more recent iPad for digital planning.
The GoodNotes app, found in the Apple store.. (You can also use Notability, and possibly other note-taking apps, but I am demonstrating with GoodNotes.)
The 12 month undated digital planner found in my Planner Store.
Adorable free clipart from My Cute Graphics
This post contains affiliate links. For more information, see my disclosures here.
What are digital stickers?
Digital stickers are simply PNG image with transparent backgrounds used for planning and scrapbooking in an app like Goodnotes for the iPad. They allow you to embellish and decorate your digital planner.
You can purchase digital stickers or make your own, and it's EASY.
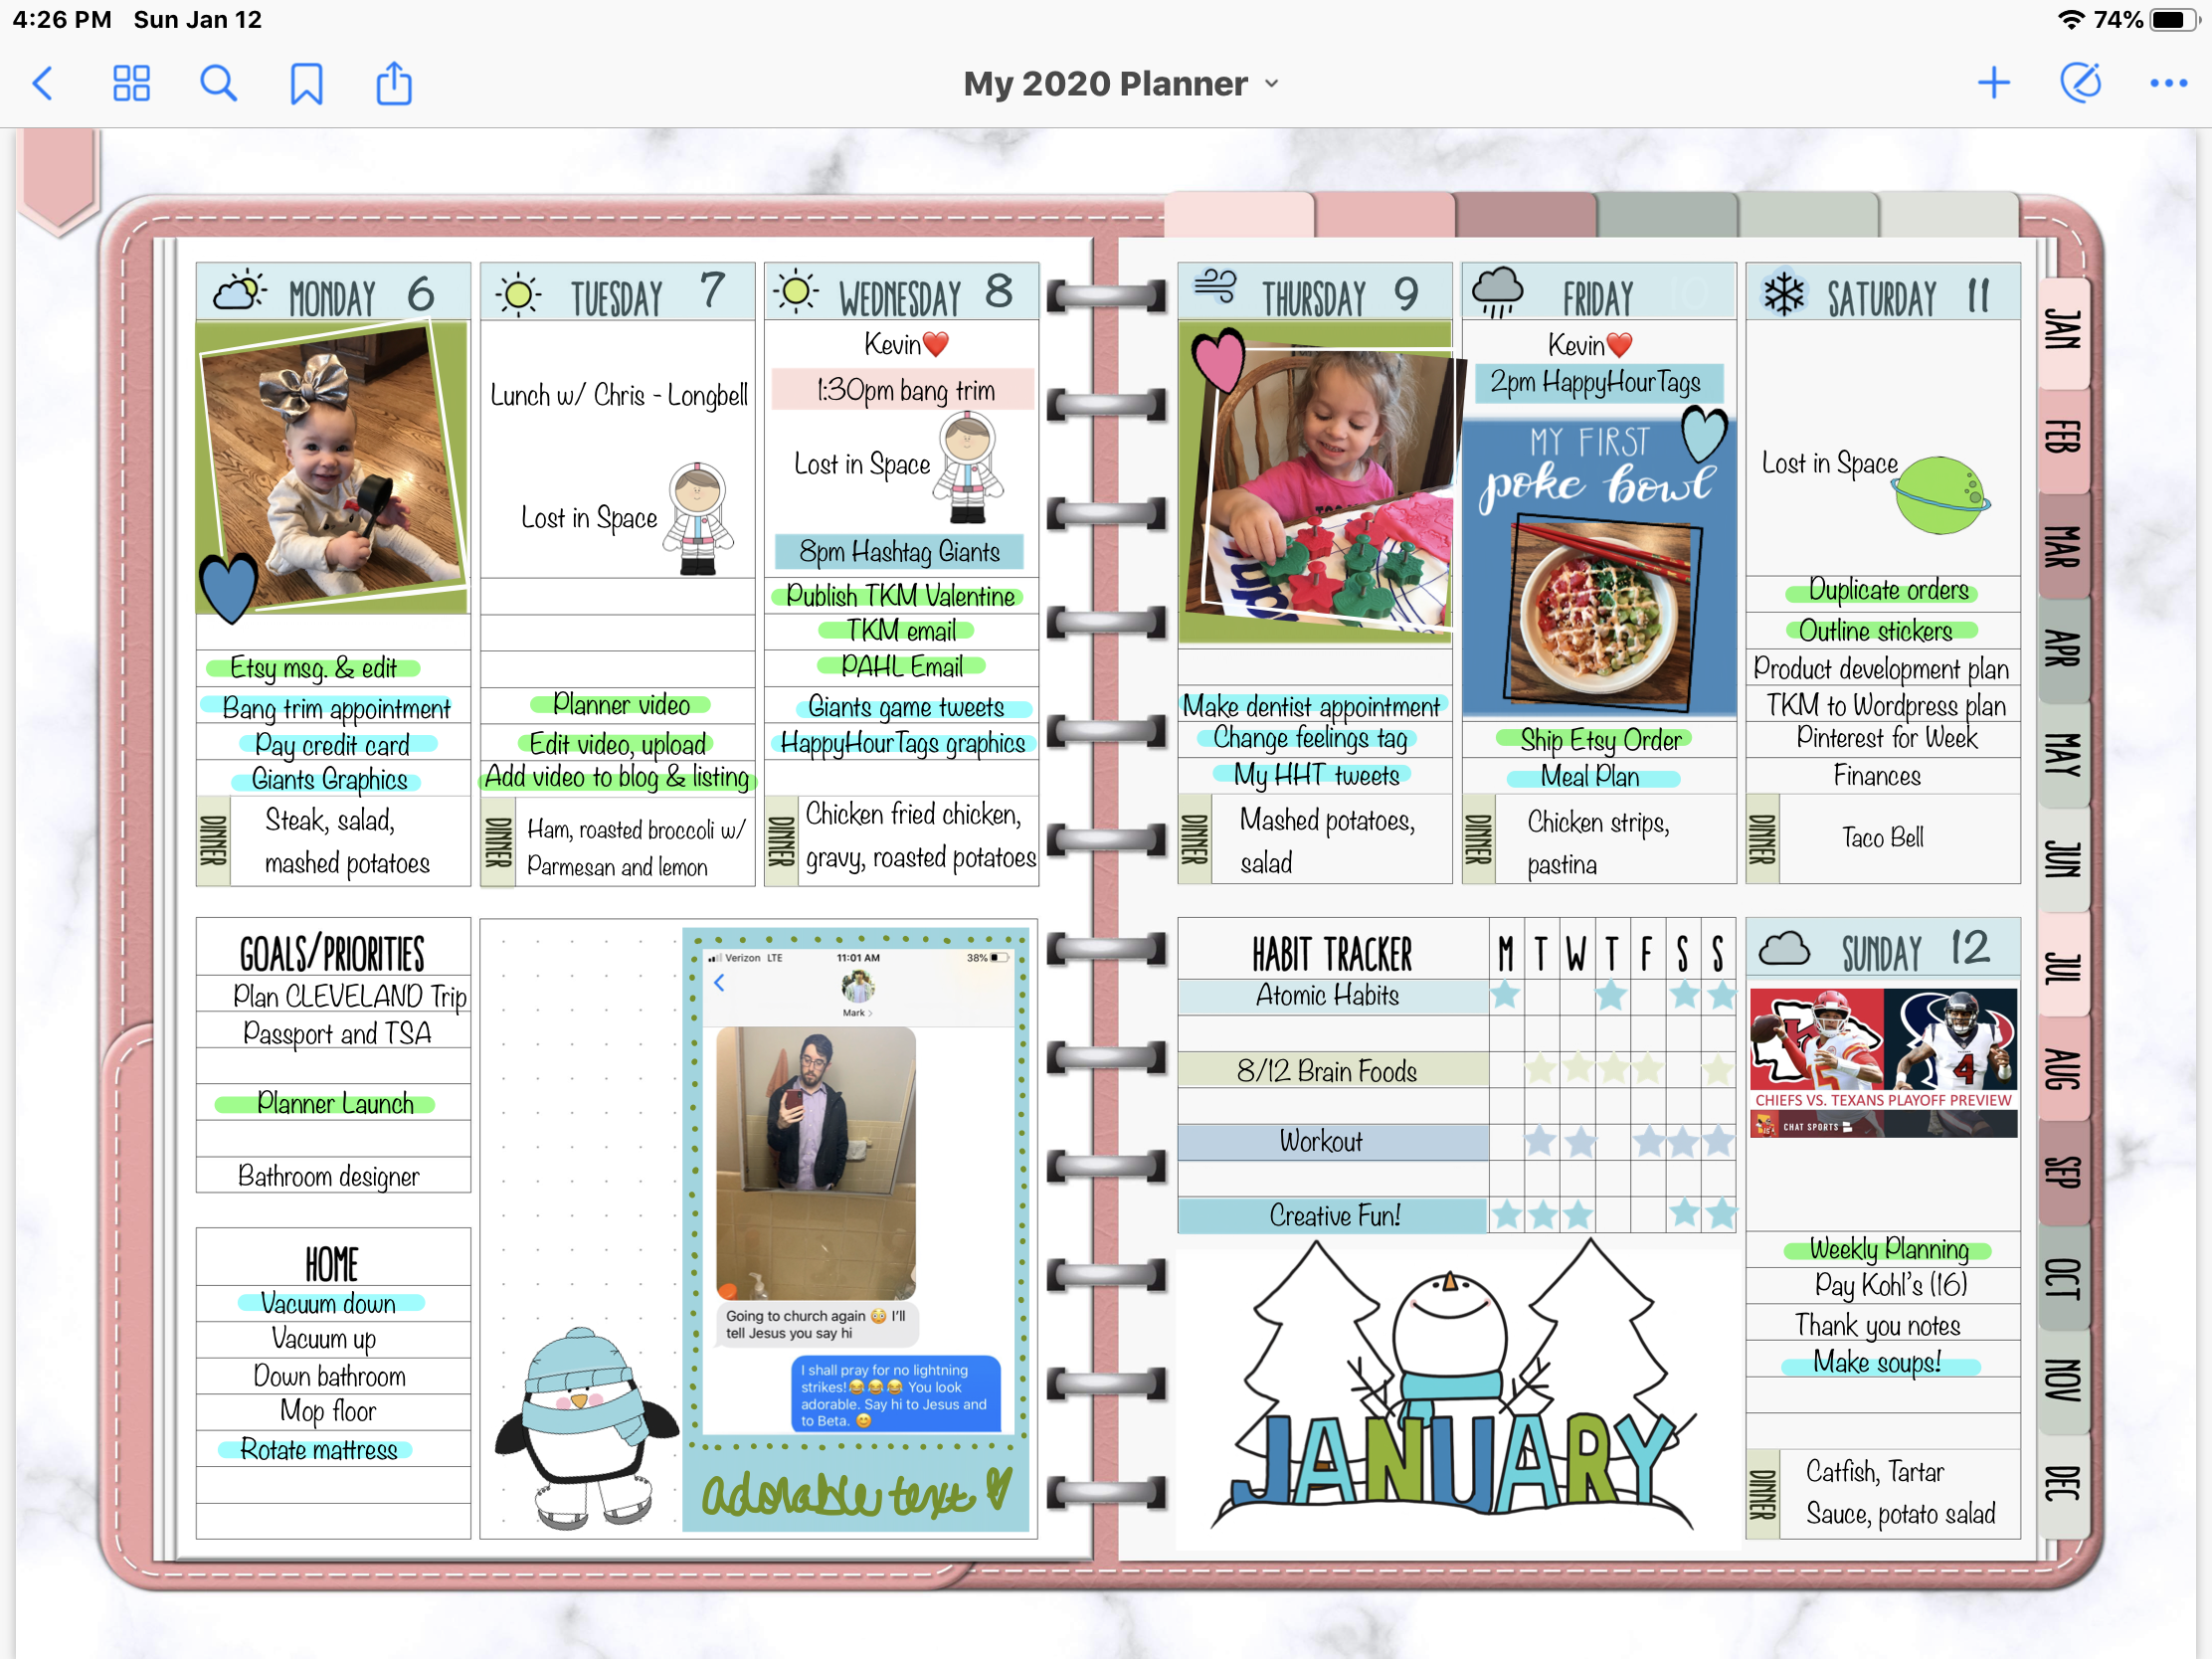
Below is a sneak peek inside my digital planner…
You can see I decorate using mainly rectangles in various sizes and shapes. The cool thing is you can resize a rectangle to ANY height and width inside of GoodNotes. So creating color-coordinated rectangle banners are the perfect first digital planner sticker project for beginners!
Watch the video below for a step-by-step tutorial, or scroll down if you prefer to read!
Follow the video tutorial right here, or you can watch the video on YouTube by clicking HERE.
1 - Choose an image or clip art that will be the focal piece of source of your color palette and save it to cloud-based storage.
Find an image.
We will start with one image to create a color palette for your digital planner. I like to use clip art (PNG with transparent background), but you can choose any image or photo.
Sources for free images.
You can always purchase a piece of clipart, but there are lots of free clipart available, especially if you are just using the stickers in your own planner. (If you intend to sell your stickers you definitely need a commercial license.)
I used MyCuteGraphics for the examples in this post. Those images are free for personal use.
google "free clipart"
google the specific type of clipart or image you are looking for, like "free coffee cup clipart" or "free soccer clipart"
use a photo on your camera roll
use a piece of clipart you’ve purchased in the past
Save your clipart to cloud-based storage.
By saving your image to cloud-based storage, like the Apple Cloud, Google Drive, Dropbox, or Microsoft OneDrive, you can easily access it on your laptop or desktop as well as your iPad.
2 - Open PicMonkey and create a blank canvas with transparent background.
Follow these steps:
Go to PicMonkey
Click DESIGN - CUSTOM SIZE (2000 by 2000 pixels) - MAKE IT
Choose TRANSPARENT CANVAS
The size of your canvas doesn’t really matter. I just go with the default 2000 by 2000 pixels. The main thing is to create a canvas with a transparent background.
3 - Import your clipart image.
Now let’s add your clipart or image from which we’ll create a color palette…
Click GRAPHICS (the butterfly icon)
ADD YOUR OWN
Go to the cloud-storage location where the image is saved and SELECT IMAGE
Drag the image to the top of the canvas.
4 - Add rectangles to the canvas.
Rectangles are the most versatile type of digital sticker because you can resize it to any height and width inside of GoodNotes. So even though the rectangle looks like a narrow banner (good for titles and headers), you can drag the edges to make any size rectangle or even a square.
From the side menu, click GEOMETRIC
Choose the RECTANGLE
drag the shape to fit width
right click on your rectangle and DUPLICATE for as many colors as you want in your color palette (3 or 4 is a good number)
drag the rectangles to arrange them on your canvas
5 - Create your color palette.
It’s simple to make a color palette for your digital stickers by matching the colors in your clipart or photo.
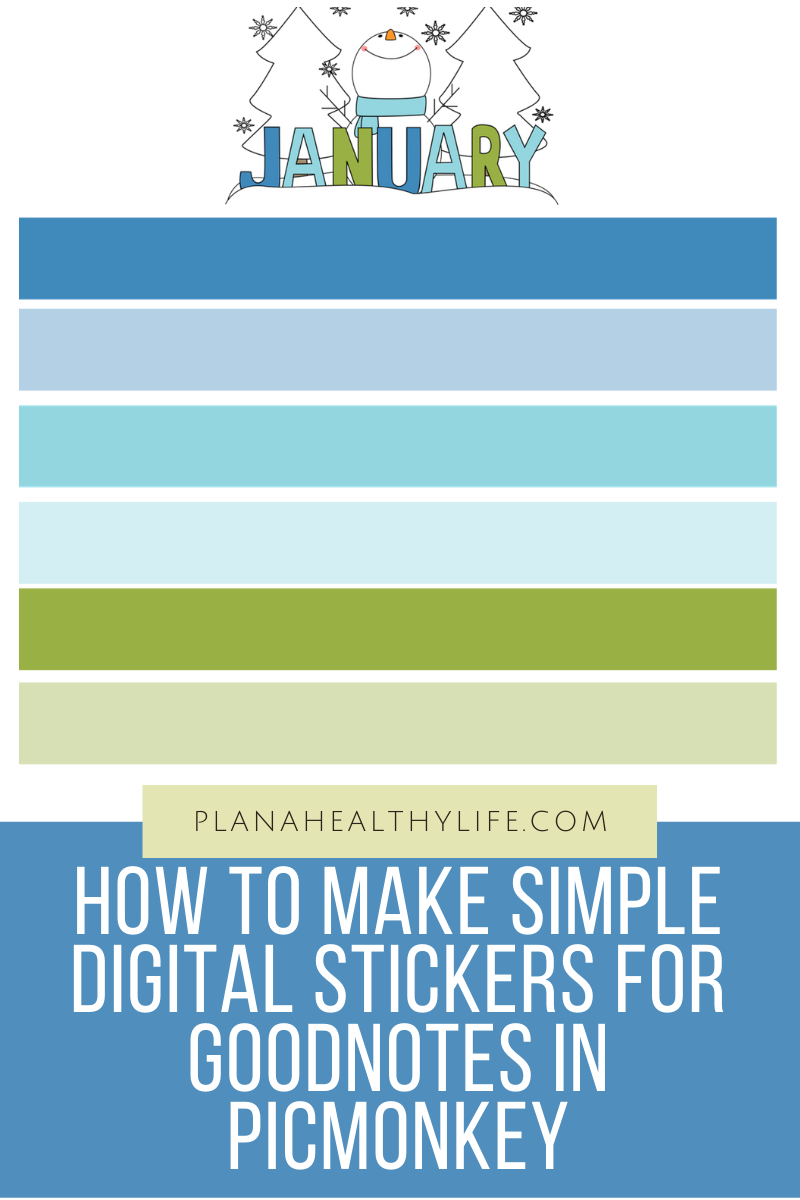
In this example I chose three colors from my January clipart. I’ll also make each of those colors a semi-transparent image so I can use it as an overlay in my digital planner.
Follow these steps:
Click on the first rectangle shape
Click COLOR 2, then select the EYE DROPPER TOOL
Move your mouse and CLICK to select a color from your clip art
Note: Color 1 refers to the border and it is transparent by default. I just leave it transparent. Color 2 is the fill color.
Repeat this process with each of the rectangles, choosing a different color for each.
6 - Consider making some of the colors semi-transparent to use as overlays.
My digital planner has headers and days of the week already included so if I use an opaque box on top it blocks out “Monday” or “Habit Tracker.” So I make some of the colors semi-transparent images. It’s almost like using these digital stickers as a highlighter - you can still see what is underneath.
Here’s how:
Make a duplicate rectangle with the colors you want to make semi-transparent.
Click to select that rectangle.
Slide the FADE bar to your desired degree of transparency. I find 60% works really well.
7 - Save the color palette to your PicMonkey hub, and export the image.
Save the canvas in PicMonkey so you can edit it and use to create new color palettes in the future.
If you have lots of colored rectangles, you can delete the clip art image from the canvas or resize to make it smaller. Or you can save the canvas with the image..
Click SAVE - and name your canvas
Export the color palette as a PNG.
Then click EXPORT and save as a PNG to your cloud-based storage
This will save the new image as one mini "sticker sheet.” You can then import that image into GoodNotes and crop it for use in your planner.
I use this “sticker sheet” method for simple rectangle shapes like this. It’s much quicker to create the color palette up front and crop inside GoodNotes when I use the shapes.
8 - Open GoodNotes on your iPad and import the sticker sheet.
Now you can use your sticker sheet!
Open GoodNotes.
Decide where you want to add the new color palette sticker sheet. You can add it directly to a monthly calendar or layout and crop there, or you can add it to a separate section of your digital planner.
Import your sticker sheet.
I have a Sticker tab in my digital planner, so I will add the sticker there.
Open GoodNotes on your iPad
Go to the page you want to add the stickers (I am showing you a page in my Sticker tab)
Click the PHOTO icon in the top toolbar
Touch the screen where you want to insert the photo
Click INSERT FROM
navigate to your cloud-based storage, find the image, and click on it
Here is the sticker sheet inside GoodNotes ready to be cropped:
9 - Crop the rectangles inside of GoodNotes.
For simple shapes like these rectangles, I just duplicate the sticker sheet and crop the rectangles into separate images right inside of GoodNotes. That’s what I did in the image below. I have these stored in the Stickers tab of my digital planner.
Once cropped, I just copy and paste them inside my planner pages and resize as needed.
If you prefer not to crop in GoodNotes, you can save each separate colored banner as a separate PNG image straight from PicMonkey.
Duplicate the image.
Make as many copies of the sticker sheet image as rectangles. I had six rectangles in my sticker sheet, so I had six copies, just piled one on top of another, on my sticker sheet. (See the video if this is unclear.)
Select the LASSO tool selected in the toolbar
Lasso the image (draw a small circle anywhere in the image)
Tap in the circle and choose COPY
Tap on the screen and click PASTE
Repeat until you have as many images as rectangle shapes.
Crop the rectangles in GoodNotes.
Start with the first image and repeat until all your colored rectangles are cropped.
Switch to the PHOTO tool from the toolbar
Tap on the first image and click CROP
Drag the borders to crop the desired rectangle and click DONE
Repeat for all the images until you have individual images for each rectangle
You can rearrange them on your page
Copy and paste your rectangle banners anywhere in your planner and decorate!
Now you get to decorate!
The image up below is my plan for next week. As you can see, other than a few pieces of (free) clipart, I only decorated with the rectangles I created. I just vary the size to fit each box.
Planned the week ahead and ready to go! Most of my decorations are simple rectangles!
Use the PHOTO tool to drag the image where you need it and to resize the height and width.
It’s simple to turn this rectangle into any size or shape, or even a square. With the PHOTO tool selected just click on the image, and drag the resizing bars to change the shape.
Once the image has been cropped, you can use the LASSO tool to copy and paste it, and resize it, anywhere in your planner.
For example, once I resized an image to cover my “Monday” header in the image above, I just copied and pasted it to cover all the days of the week. The sizing was perfect.
That’s it! A few simple steps to take a piece of clip art, create a matching color palette of simple rectangle shapes in PicMonkey, import and crop them inside of GoodNotes 5 for endless digital planner decoration ideas!
Do you love digital planning? Here are some other digital planning posts:
Don’t forget to PIN this post so you can find this post in the future!


