How to Duplicate, Rearrange, Delete and Recover Pages in GoodNotes5
One of the benefits of digital planning is the ability to easily add, duplicate and rearrange pages inside of GoodNotes 5. Knowing how to customize your planner by copying and moving pages is critically important.
In this post I will demonstrate:
A quick and easy method to duplicate a page in Goodnotes
How to duplicate specific pages from a Templates section in a digital planner
How to duplicate multiple pages at one time
How to copy pages from one digital planner to another
How to rearrange pages in your digital planner
How to delete pages
How to restore pages you may have accidentally deleted
You can watch the in-depth video tutorial here:
Or watch the video on YouTube: CLICK HERE
And if you prefer to read, please continue!
How to duplicate a page in GoodNotes 5 - the quick and easy way.
If you are on a page in your planner - and you want a clean new copy of the exact same page added:
Tap on the ADD PAGE ICON on the upper right side of your screen. It looks like a page with a PLUS sign inside.
The default is to add your new page AFTER the existing one. You could change it to duplicate the page BEFORE the existing page, or make the new page the LAST PAGE in your planner.
You will see an image of the current page/template. Tap the image to duplicate the page.
Here’s how to duplicate a page in GoodNotes 5.
How to duplicate a page from a Digital Planner Templates Library using COPY and PASTE
Many digital planners or notebooks, like the Girl Power Digital Notebook or Rainbow Digital Notebook in my online shop, have template libraries or template sections.
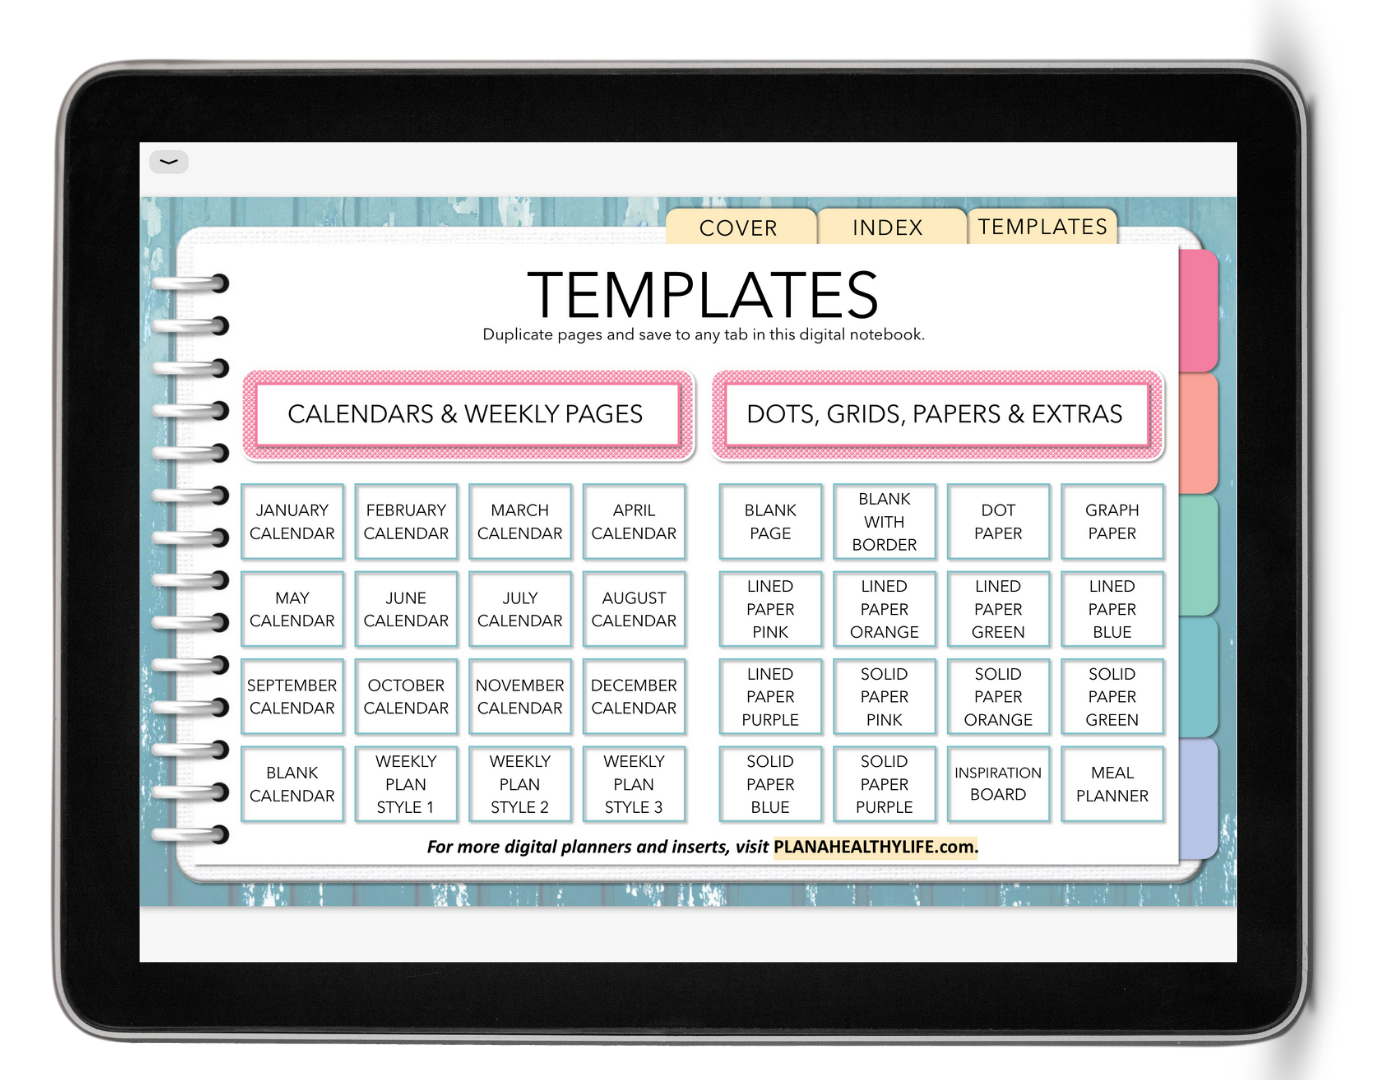
This is a section in your notebook that has a variety of pages you can use anywhere in your planner. Using templates allows you to easily customize the planner in a way that makes you happy.
This is the Templates section in my Girl Power Digital Notebook.
To duplicate pages in a Templates section:
In a Templates section of your digital planner click on the page you want to duplicate
Tap on the four-square icon in the upper left corner for the thumbnails view of your planner
You’ll see the current page has a blue box around it
Tap on SELECT in the upper right corner
Tap on the circle below the highlighted page so that a blue check mark appears, then select COPY in the upper left corner
Tap on DONE, then CLOSE
Now, navigate in the planner or notebook to where you want to add the page
Again tap on the four-square icon (the page you are on is outlined in a blue box)
Tap on the arrow underneath that page
Tap on ADD PAGE AFTER, then PASTE PAGE
Then tap CLOSE
How to duplicate multiple pages using copy and paste.
Rather than selecting individual pages from the templates library, you can use the THUMBNAILS view to duplicate multiple pages and the process is almost exactly the same. explained…
Tap on the four-square icon for the thumbnail view
Tap on SELECT in the upper right corner
Scroll to find the pages you want to duplicate
Tap on the circle below each of those pages so that a blue check mark appears, then select COPY in the upper left corner
Tap on DONE, then CLOSE
Now, navigate in the planner or notebook to where you want to add the pages you just copied
Again tap on the four-square icon (the page you are on is outlined in a blue box)
tap on the arrow underneath that page
tap on ADD PAGE AFTER, then PASTE PAGES
Then tap CLOSE
How to copy and move pages from one digital planner to another.
Inside the document you want to copy the pages FROM, tap the four-square icon in the top-left corner to enter thumbnail view.
Tap Select in the top-right corner, then select the pages you want to copy/move.
Tap Copy.
Tap Done > Close.
Open the document YOU WANT TO COPY THE PAGES TO, and go to the page before/after which you want to insert the copied pages.
Click the Add Page icon near the top-right corner, choose Before / After / Last Page, depending on where you want the pages to appear
Tap Paste Page(s)
How to rearrange pages in your digital planner:
It’s easy to reorder pages in your digital planner using the THUMBNAIL view and the drag-and-drop
Tap the four-square icon in the upper left to go to thumbnail view.
Press and hold a page thumbnail until it starts "lifting off" the page.
Hold on to the page and drag it to the desired location, then lift your stylus or finger.
Here’s how to rearrange pages in your digital planner.
How to delete pages in your digital planner:
You can easily delete pages from a digital notebook or planner in the thumbnail view.
Tap on the thumbnail view (four-square icon).
Tap the Select button in the upper right.
Tap on the pages you want to delete.
Tap Trash at the top.
Here’s how to delete a page in GoodNotes 5
And finally, here’s how to recover documents and and pages from the Trash Bin.
What if you accidentally deleted a page or a document from GoodNotes? (It’s 2020, this can happen!) The good news is deleted documents and folders stay in the Trash Bin until they are recovered, moved, or deleted permanently.
Here’s how to recover items from the trash bin...
From the Library view, tap the Gear icon at the top-right corner > Trash Bin.
Tap Select in the upper right.
Tap the items you want to recover.
Tap Recover to move the selected items back to the respective locations where they were deleted. OR Tap Move to select a single location to move the selected items to.
I hope this tutorial helps as you customize your digital planner or notebook in GoodNotes 5.
Be sure to check out my Video Tutorials Page for more Digital Planning Videos
Be sure to PIN this post to find it in the future!


