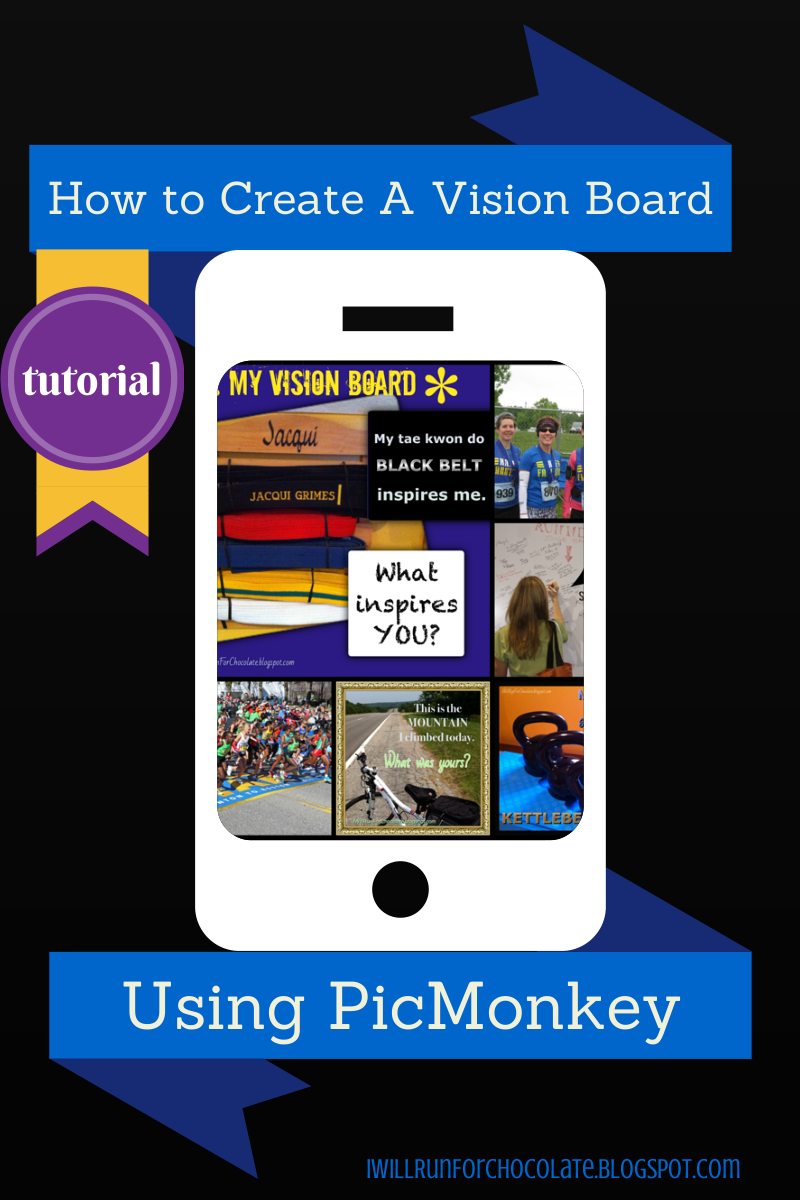
Tutorial: How to Create a Fitness Vision Board Using PicMonkey

If ever they was a time to make a vision board, it's in the midst of a No Sugar January. A vision board is simply a collage of photos and quotes to remind you of your goals and to inspire you.
Warning: This tutorial incredibly anal detail-oriented so ANYONE can create a beautiful fitness collage. Even me!
Want to create your own vision board in PicMonkey? Here's how:
1. Decide what you want your vision board to portray.
A vision board is simply a visual representation of goals you would like to achieve, products you would like to purchase, places you would like to visit, or ideas you would like to explore. The board in this example is specifically crafted for diet and exercise goals, but you can easily create a vision board for planning a trip, remodeling your home, or any other goal you have.
 |
| Create your own vision board using PicMonkey! |
2. Collect your images.
This is the fun part! You can collect your images all at one time or over a period of time . I created a folder on my computer called “Vision Board” (unique name, no?) and add pictures to that board when something catches my attention.

Where do you find photos?
- your camera
- photos stored on your computer
- search the web for images
What types of photos?
- Your “before” picture
- Your "current" picture
- Your "after" picture"
- Pictures of the body type you are striving to achieve
- Photos of women or men who excel in the sport you train
- Motivational quotes
- Photos of fitness equipment you use or would like to use
- Pics of healthy foods
- Logos for races you have run or would like to enter
- Goals you aspire to reach
- Pics of your training schedule
- Pics of your fitness heroes or mentors
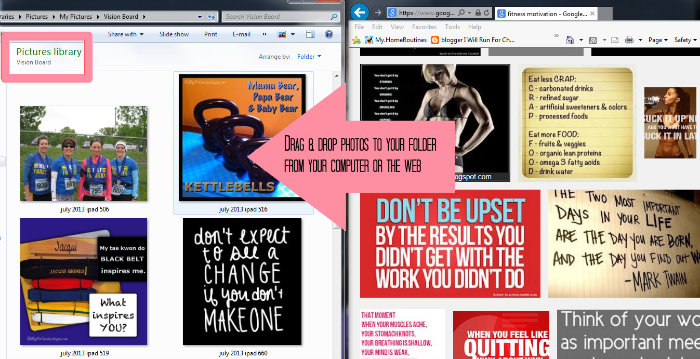 |
| Drag & drop photos from the web or your computer to your Vision Board folder. |
3. Now let's have fun with PicMonkey!
PicMonkey is a great, FREE, web-based photo editor. It is very intuitive and easy to use. Honestly, to call it a photo editing program is to do it a disservice – it is so much more. You can make cool graphics, photo cards, collages, text banners and more. In fact, I created all the graphics on my blog (header, side bar graphics, etc.) using PicMonkey.
Now let's get to work. Pull up PicMonkey on your computer and let's go!

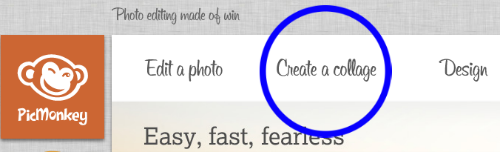
Click on CREATE A COLLAGE
On the left side, click the LAYOUT button, which is the second from the top and looks like a mini collage.

Now you are presented with nine different collage formats, plus the opportunity to create your own.
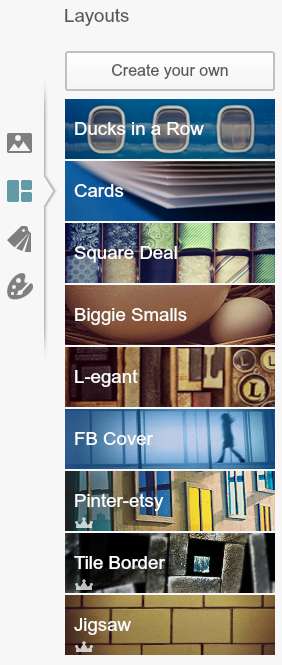
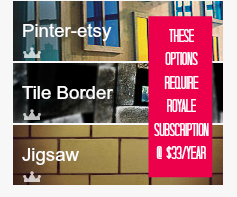
You’ll note that the bottom three options have a small crown on the logo. The crown means it is part of PicMonkey's Royale subscription service. Royale costs $33 per year, but you don't need Royale to make your collage. The free tools alone are sufficient.
For the sake of simplicity, let’s create a very simple vision board using the L-egant format. I’ll give you some options to make your collage more detailed later.
Click on L-EGANT.
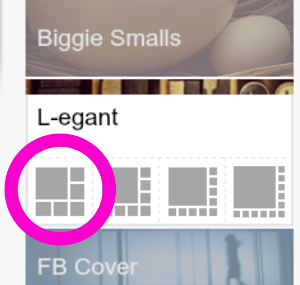
You will see four collage options – let’s choose the first one to work with. You can alter or change this later. Click on the first option.
Hooray! Now you have a blank collage to work with. This one has spaces for six photos. (I know you probably have way more than 6 photos. We’ll tackle those later. For now, let’s choose six pictures.)

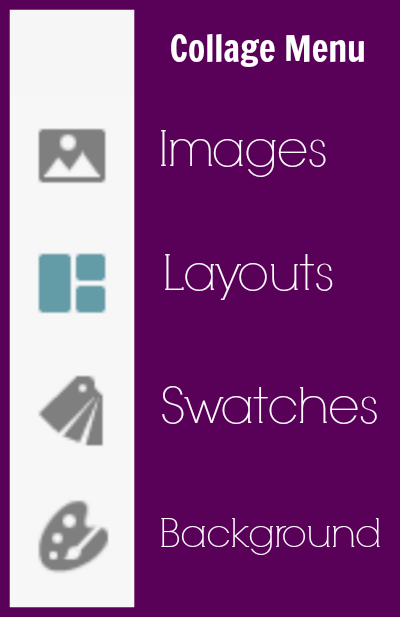
Go back to the icon bar on the left and click on the top image which represents pictures.
You have the option to use the sample photos, or to add your own. Click on the little arrow next to “samples” and choose YOUR OWN.
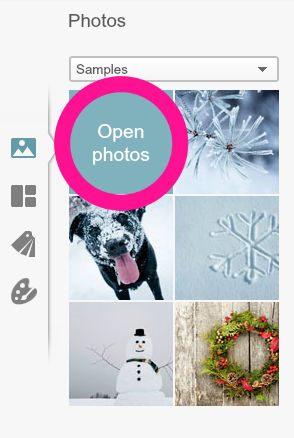
You have several locations from which you can pull pictures, but let’s use the Vision Board folder you created on your computer.

Scroll down to your Vision Board folder and double click on it to open the folder. Let’s choose 6 photos to start. Put your mouse on a photo and hold down the CONTROL button while you click on the photo. You probably already know this, but using CONTROL will let you select all six photos at once. Continue to CONTROL + CLICK five more photos.

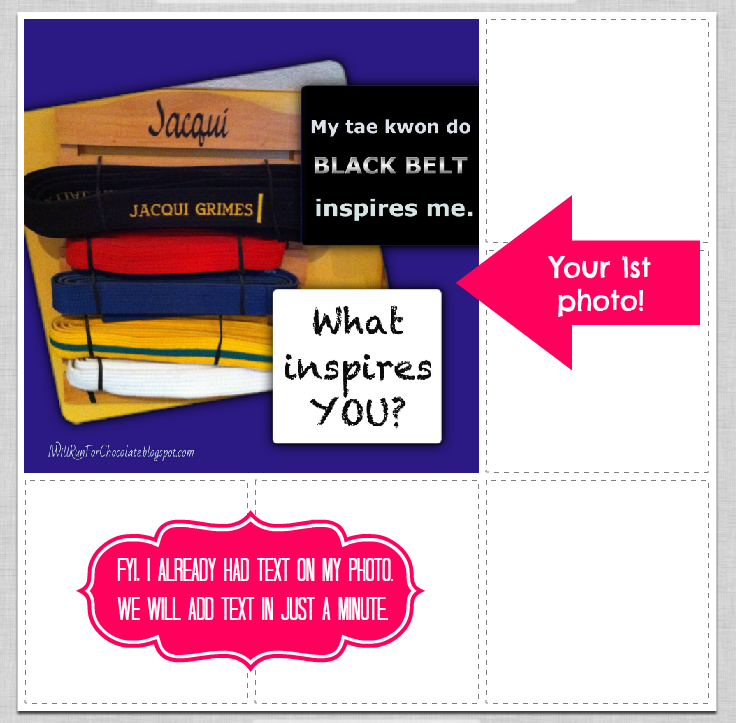
Yay! Now you can see 6 photos on the photo toolbar. Now we’ll drag photos to each of the six squares on the collage.

Choose the photo you want to fill the largest square, click on it, and drag it to the square. See how the photo fills the square? Now repeat with the remaining five photos.
Photos can be dragged from one spot to another. Feel free to play with the arrangement.
Hover your mouse over a photo for an edit menu to appear. You can enlarge the photo, edit brightness, and move it within the box.
Let’s add a background color. Click on the artist palette icon on the bottom left menu. A color menu appears. Just click on the color you would like. If you wish to match a color in your photo, just click on the dropper icon, then click on the color in the photo you wish to match and it magically appears as the background! Cool, huh?

I chose a simple black background.

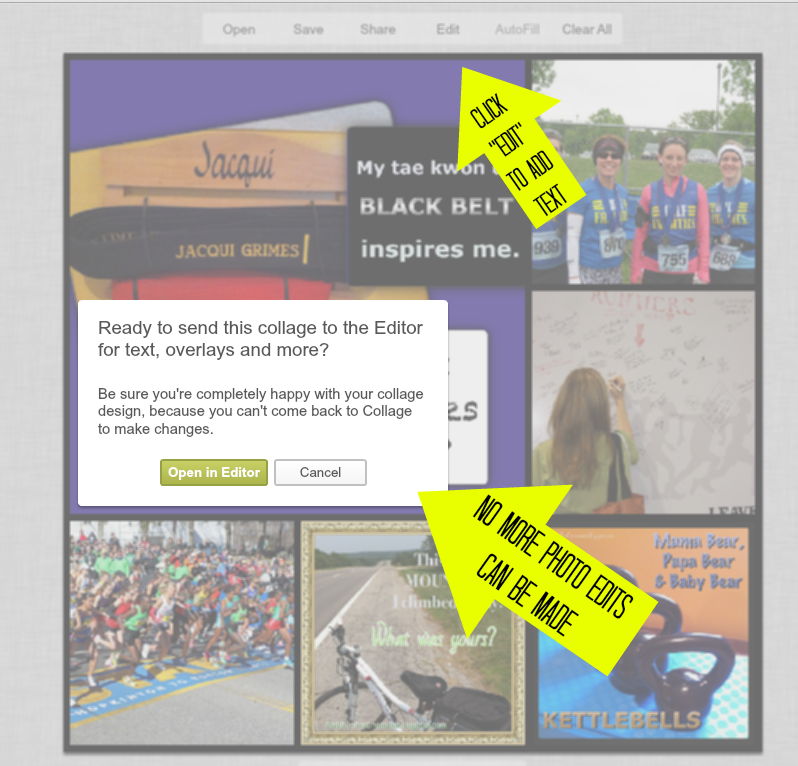
Now let’s go ahead and do some “decorating.” To add text, clip art and overlays, you need to click the EDIT button on top of your collage. Once you send your collage to the editor, you cannot add additional photos. (I’ll show you how to add more than six photos in the next tutorial. For now, let’s finish our simple vision board.)
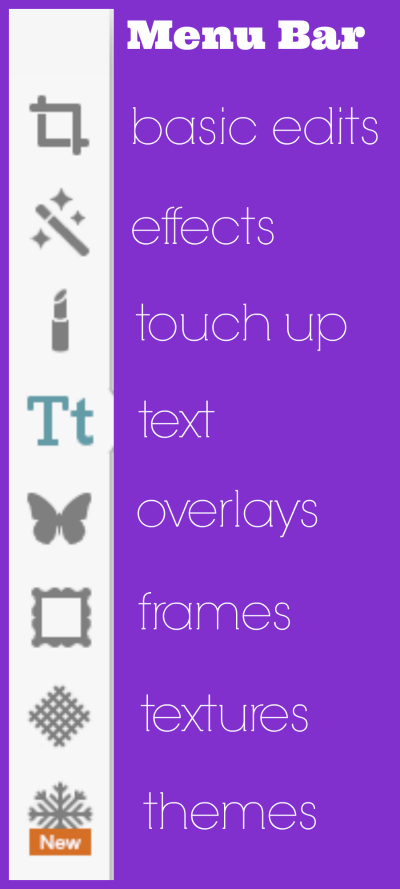
You’ll notice a new menu bar on the left side. Here is a quick key to the edit functions:
There are absolutely TONS of ways to edit your collage. Your really have to play around with the textures, overlays and frames. Spend a little time clicking on buttons to see what effects they have on the picture. There is always a “cancel” button and the undo arrow at the top of the screen!
Let’s add some simple text. (As you can see, I already had text in some of my photos; you may want to add more additional text than I have done.)
Click on the TEXT button, scroll down to a font you like, and click ADD TEXT. The text box will appear in the middle of your collage. Simply drag it to the spot where you would like your words to appear. Then begin typing.
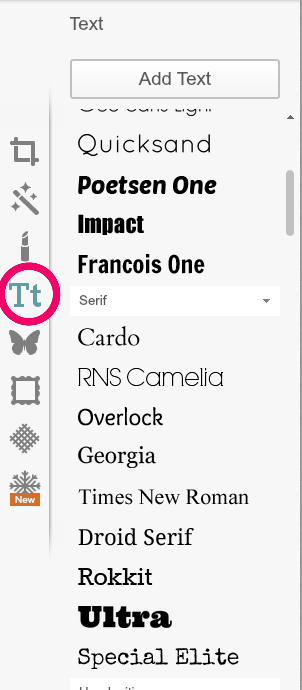
To change the color, simply highlight the text and choose a color from the text editor menu. You can also highlight the text and change the size by sliding the SIZE bar to the right or the left.
Add more text boxes if you wish and be sure to play with different fonts and colors. Have fun!

Play around with the overlays. These are shapes and clip art you can add to the pictures, as well as fun photo effects like textures and filters. I am going to add a star because for some reason that flower/star image makes me happy. (Hence you see it a lot on my blog!)

The basic process is the same as adding text. Click OVERLAYS, STARS, and then I clicked on the star I wanted. See that I changed the color to match my title.

It's easy to reposition your text and images - simply drag them to your desired location.
I’ve added a few more words and an arrow here. Play with your collage and make it pretty!

Now let’s save your collage. Click the SAVE button on top of your collage. A save screen will appear on the left.
Name your collage and save in either jpg or png. I prefer png because it seems to provide a higher-quality image.
Then specify the folder where you would like the image saved. I saved mine in the same Vision Board folder I used to collect pictures.
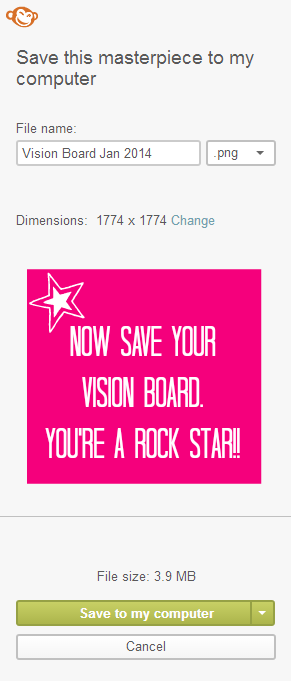
You’re done! Congratulations on creating a fitness vision board!
Will you be making a vision board? Do you find vision boards motivating?